Monday, January 26, 2015

Alcohol Stove (Evernew TI DX set)

Pros


  • Lightweight
  • Pot stand
  • Wind screen
  • Fluid level markings
  • Cold temperature configuration
  • Compact, stove nest in stand

Cons

  • Stability, especially with large diameter pot
  • Wind screen performance
  • No way to conserve fuel from burn to burn
  • No obvious method to snuff stove

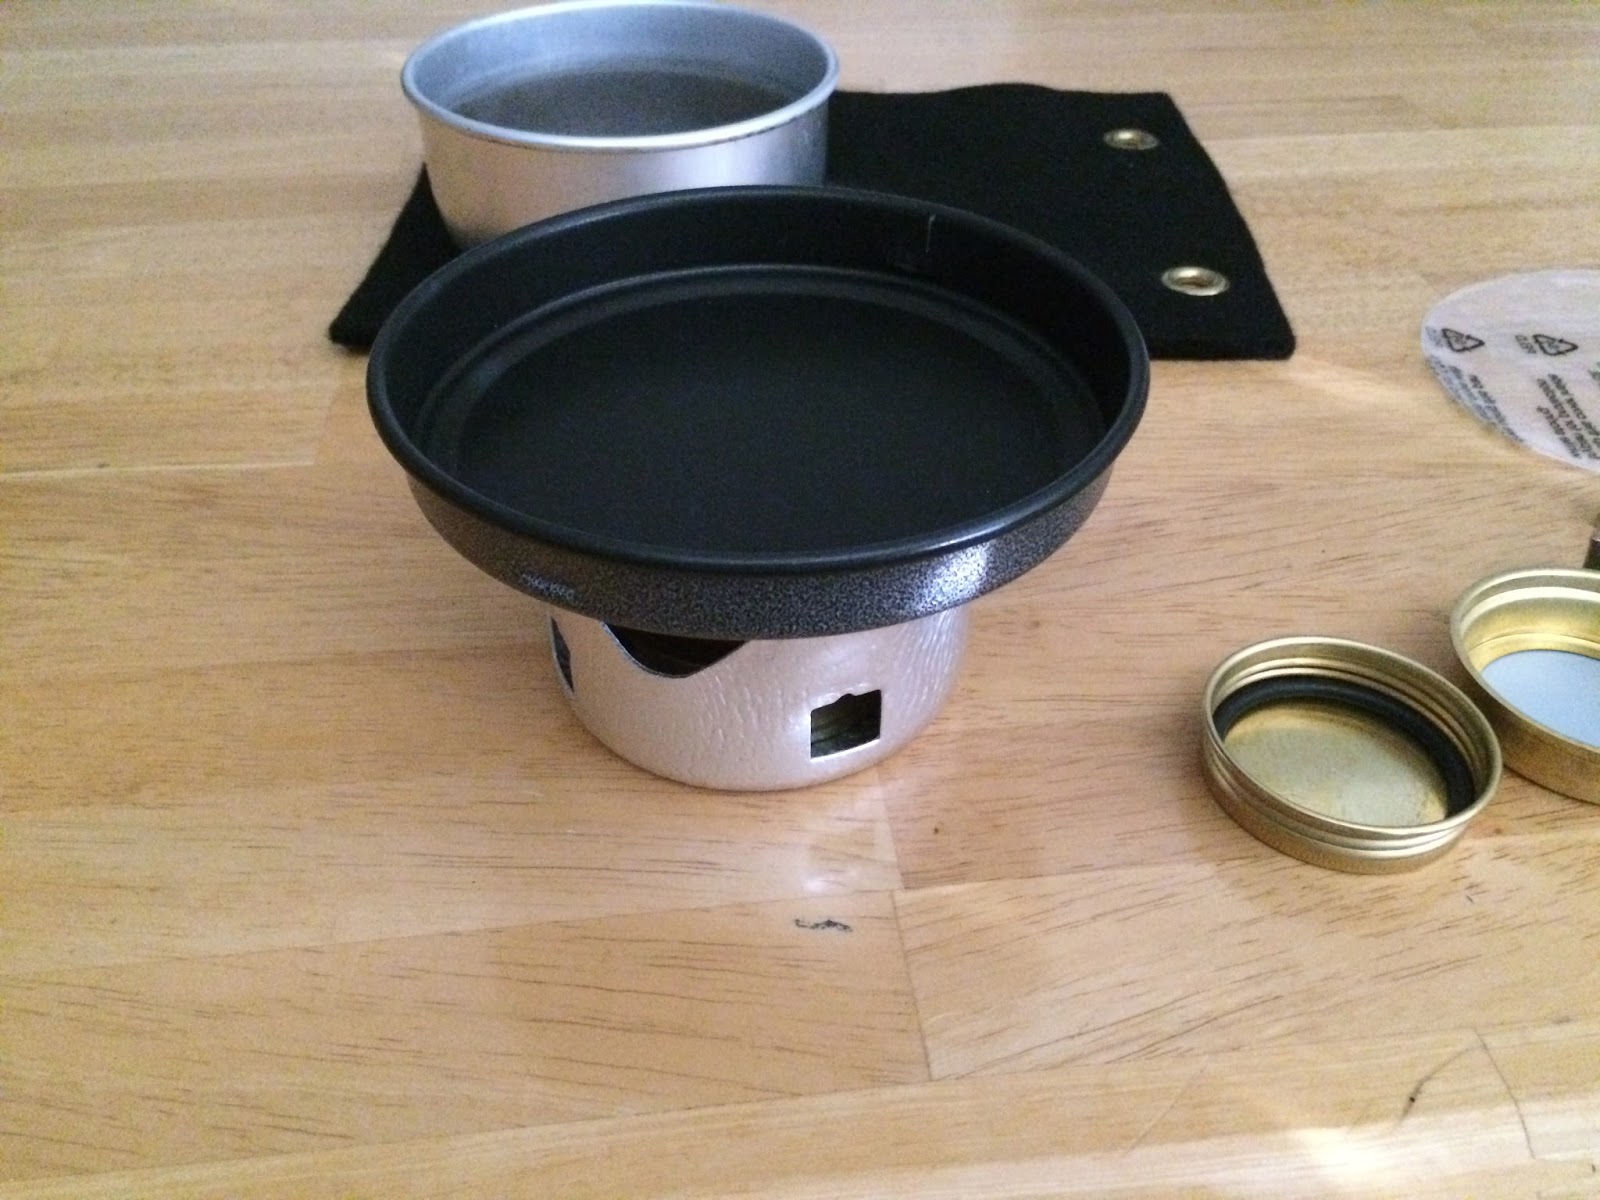
The Evernew TI is made from titanium.  The pot stand/wind screen is also made from titanium. Total package weight is 3.2 ounces (90 g). Since I already have a MSR Titan kettle I did not purchase the Evernew pot that is part of the Appalachian set.

One of the first things you will notice about the Evernew stove is that it has two rings of burner holes. When the stove is first lit, before the bloom, the flame burns from the large center hole, then jumps to the upper ring of holes, and immediately jumps down to the lower ring.  While burning, the upper ring of hole appear to not have any flame coming from them.  They appear to simply facilitate the bloom.

The time to boil 2 cups (~500ml) of water in the MSR Titan kettle was about 41/2 minutes.  This is faster than any of the Trangia stoves that I tested.  I also noted that the Evernew spirit burner used, by weight, the same amount of fuel as the Trangia stoves that I have tested.

One thing that I missed with the Evernew burner, was the ability to snuff out the stove. In a separate test, without the stand, I was able to place a pot over the stove and snuff it out.

Since there is not a lid for the Evernew spirit burner, the remaining fuel either needs to be poured out, or left to burn off. The two level nature of the burner made reclaiming the alcohol nearly impossible without a wide mouth jar or funnel to capture the liquid as it pours from two locations.  Burning the fuel off seems a better solution than reclamation. You will burn more fuel, than the Trangia, since you cannot conserve fuel from one use to the next.  I have found that predicting the fuel needed is also difficult since fuel use varies with wind and temperature.

The cold weather screen stores under the burner, and when in use is between the burner and the pot. The screen reflects heat back to the burner help maintain a good burn, plus radiates heat to the pot.  I found that the screen adds about 30 seconds to the burn, at the same temperature as the test without the screen. The screen also upped the fuel consumption.

On really odd thing to me, was the warning about refilling a hot stove.  This warning is stamped into the bottom of the stove and can only be read if you invert the stove.  The one place you cannot see if the stove is hot!

One other note.  I also purchased the Ti Cross Stand.  That was a major disappointment.  While small, light weight, and has a larger pot bearing surface, the boil times increased by about one minute.  I suspect it has to do with the distance above the stove that the pot is at, and the cross stand has the pot too close to the stove.  I have include pictures of the cross stand.

Note: The stove and stand are a dull silver/gray out of the box.  The blue you see in the photos is what happens to titanium when heated and then allowed to cool.  Adds a nice look, but does not effect the stoves performance.  Probably messes with the metal hardness, but I have not looked into the science of it, since I have not noticed any softening of the stove or stand.


Packed DX set
Stand base, stand upper (inverted),
Ti spirit burner,
and cold weather screen
Cold weather screen in storage position
of lower stand
Burner place in lower stand.
Note cold weather screen stored under burner
Assembled DX set w/burner
Assembled DX set w/burner and cold
weather screen place into position.
Ti Burner w/disassembled cross stand
Assembled cross stand
Ti Burner with cross stand in position
Odd place for a warning

Sunday, January 25, 2015

Dreams of a lighter pack vs reality

My plans for my major summer backpacking trip have yet to solidify. As I study maps of the area I plan to visit, I keep changing my route wanting to see it all.  One thing keeps coming up.  No matter which route I take or how many days I plan to stay out. Everything I will need I must carry in my pack.

Over the years I have gone through several phases on what to carry.  When I first started backpacking, back pack stoves were basically unheard of in my area.  I did not know a single person that had one.  We cooked over an open fire, carried relatively heavy equipment.  Dehydrated food was not very tasteful.  But I carried a relatively light pack, with just the bare essentials.

As the years went by, my equipment changed.  I also added a stove and water filter.  Dehydrated food quality improved. While I essentially carried more gear, the weight of the pack remained about the same.

Along the time line I married a wonderful lady, and our family came into being.  While my son was still quite young, I remember taking him back packing with me.  I also remember the 80 lbs. weight of the pack I carried.  I no longer carried just the essentials.  I also carried the 'just in case', and extra items that would make for a good experience for my son.

Later, when my son was in the BSA, and going on outings, I was invited along by the Scout Master to help out. Again, my pack contained extra stuff, 'just in case' some scout had problems.  While it did not weigh 80 lbs.  It did weigh 60 lbs. Then came the extended trip into the Wind Rivers of Wyoming.  For this trip, my son and I made some gear changes, and I decide that all the 'just in case' stuff that I had carried, and never used, would not be making the trip.  As a result, my pack weighed 34 lbs.

After my son aged out of scouting, and my professional life became quite demanding. I found that extended trips became nearly impossible to plan, and a simple over-night trip was about all I could manage.  During this time, my eight year old daughter asked if she could join me on my over-night trips.  Suddenly my pack went back to the 60 lbs range. As I carried extra gear, 'just in case', so that my daughter could have a good experience.

My daughter and I have been backpacking for almost 15 years now, and my pack has slowly diminished back to the 45 lbs. range.  While we split gear, I still have a tendency to carry the majority of the gear to lighten her load, but she is always pushing back to let me know that I can quit protecting her.

She is now in college, and our trips have become harder to orchestrate.  So I have started to solo hike. I have added a satellite phone, gps, and solar charger to the pack as safety devices.  This has added some weight, but not a significant amount.  What I have found is that I take more 'just in case' gear again, because I do not have someone else to rely upon for help.  To reduce that weight I have invested heavily in ultralight gear.  I now worry about ounces.  I check the weight of stoves, bags, filters, etc. before purchasing.  I have been able to keep the weight in the 45 lbs. range by doing so.

I have become a gear head. I still probably carry too much gear, but each solo trip trims unused gear from my pack. I hear of backpackers that go for a week (or more) with a sub 20 lbs. pack and I do not know how they do it. The area that I pack in is extremely remote, high altitude (above 10,000 ft), and on my last trip, I did not see another person for the entire trip.  The weather can change from sunny to snow, 80° F to 20° F in a matter of hours (if not minutes).  I must carry gear for all conditions, so I will continue to carry 45 lbs. and dream of a lighter pack.   Happy trails....

Friday, January 23, 2015

Alcohol Stoves (Trangia Triangle)

Pros

  • Small
  • Lightweight
  • Stuff sack
  • Trangia burner will also fit in stuff sack

Cons

  • Mediocre wind protection
  • Separate pot required
  • No included burner
Unlike the previous two Trangia stoves I have written about, the Triangle does not come with a spirit burner.  Trangia clearly states the fact that the burner is not include on their web site.  The packed weight (with Trangia burner) is 9 ounces (254 g).  A Trangia burner can be carried in the same stuff sack as the Triangle.

Of all the Trangia stoves, this is the smallest and lightest.  The stove contains three flat stainless steel panels, a ring to hold the spirit burner, and a stuff sack.  The three panels nest and when disassembled lie flat. The whole thing, minus the burner is less than a 1/4 inches thick.  You should also note that unlike the other Trangia stoves, the Triangle does not include a pot.  The Triangle will not nest in a MSR Titan kettle, but will nest in the MSR Titan pot.

The boil test with 2 cups (~500ml) of water took 7 minutes. This is shorter than the Trangia Mini and I chalked this up to the slightly better wind protection.  Note that I used the Mini pot for the test. Where Mini has some deep cutouts that expose the burner to the wind the Triangle is a solid wall up to the tab that supports the pot.  The wind only chance in the small window directly below the pot. This is not complete wind protection, but significantly better than the Mini.

I am impressed with the Triangle.  The Triangle packs small, but when assembled is very stable. However, the fact that a burner is not included seems odd to me. Why sell what is basically a stove, but without the heat source?

Packed
(I also placed a burner in the stuff sack)
What comes in the package
Stand assemble without stove holder
Assembled Triangle without burner
Assembled Triangle and burner ready for use

Wednesday, January 21, 2015

Alcohol Stoves (Mini Trangia)

Pros

  • Small
  • Well engineered
  • Complete stove (burner, stand, pot)

Cons

  • No wind protection
  • No stuff sack
  • Difficult to find locally
  • Long boil times


The Mini Trangia Mini shares some attributes with the larger Trangia 27. Two main obvious things are the burner and the nesting of pieces to form a complete stove system.

The Mini includes a spirit burner (with screw lid, and snuff/simmer ring), pot stand, .8L pot, non-stick fry pan (doubles as pot lid), and pot lifter.  The pot has a rim on the bottom to help stabilize it on the pot stand.  The fry pan also has a small rim to position it on the the pot (when used as a lid).  The packed weight is 12.3 oz (348 g).

The burner nest in the stand, the stand nests in the pot, and the handle rests on top of the burner. The fry pan then snaps onto the pot completing the packed unit.  The fry pan snaps on tight enough that the packed stove does not fall apart in your pack.  There is no stuff sack included, nor available from Trangia.  The Mini does not really require a stuff sack, but I prefer one to keep the aluminum from rubbing on things in my pack and leaving a silver/gray residue.

In my testing the Mini took 7 1/2 minutes to boil 2 cups (~500ml) of water.  This is about one minute longer than the Trangia 27.  The pot holder does not provide any wind protection, and boils times can increase significantly in real use on the trail if a separate wind screen is not used.

Packed Mini Trangia
Packed ready for lid
Mini Trangia 
Pot stand and burner
Rim on bottom of pot
Pot on stand showing small rim on fry pan
Fry pan on stand
Spirit burner and snuff/simmer ring

Monday, January 19, 2015

Alcohol stoves

Seems that alcohol stoves have peaked my curiosity lately. I even went so far as to build several from soda cans.

First up the Trangia 27

Pros
  • Well engineered
  • Sealable
  • Snuff device included
  • Complete (burner, stand, wind screen, and pots)
Cons
  • Heavy
  • Large
  • Stuff sack not included
  • No local store carry Trangia
Trangia makes a great stove in various configurations. From the complete 27 and 25 series, to the more compact mini, to the ultra-light triangle and open spirit stoves. All Trangia stoves are built around the same burner. I have two of the Trangia burners (one came with the winter attachment). While the burners are not the lightest alcohol burners I have used, they are perhaps the best engineered. They have a screw on lid with an O-ring to seal the burner and any alcohol within. This keeps any residual alcohol from leaking into you pack. The Trangia documentation states that storing alcohol within is not recommended, and in fact one of my burners leaks alcohol around the crimped ring where the stove is assembled (only an issue if the stove is not upright, and I fixed it with a little lead free soldier). The other burner does not leak. The burners also have a snuff/simmer lid that stores around the screw-on lid. I use this attachment to snuff the stoves after use. I have never had the occasion to actually use it as a simmer device. There is also a winter attachment to help heat the alcohol that works extremely well (I used the attachment is some 4ºF weather). These stoves are impressive in their design and engineering.

Trangia 27: The burner, pots, stand, and wind screen all nest. When assembled it is probably the best alcohol stove system I have seen. This thing can be used in any weather. The drawbacks for me are the pack size and weight. The unit (with stuff sack and winter attachment) weigh-in at a little over 38.2 oz (1084 g). Adding to the weight is the fuel. The stove requires between 1 (30 ml) and 2 (60 ml) ounces of fuel to boil 2 cups (about 500 ml) of water in 6 1/2 minutes. I you figure 2 ounces of fuel per meal, the weight really begins to add up. Trangia sells fuel bottles in 300, 500, 1000 ml sizes. That 5, 8 and 16 boils (meals) respectively. The stuff bag and winter attachment are sold separately. Also available are a multi-fuel and canister burner accessories.

Esbit alcohol burner is almost identical to the Trangia burner. I have not tried the Esbit, but I have seen the burner available locally. That is only the burner, not the entire package I have describe above.

Note: Use a Trangia fuel bottle. The pour top is unrivaled. Do not use aluminum bottles to store alcohol. The alcohol will corrode the bottles quickly! MSR bottles are unlined and will quickly have issues. ;Optimus bottles have an internal coating, but the mouth has gaps between the external paint and the internal coating and will quickly corrode as well (I speak from sad experience :( )

Next up will be the Trangia mini.

Stuff sack (carbon felt is 8.5 x 11.0 in.)
Complete stove packed
Strap and fry pan remove showing nesting
Explode view
Burner packed
Snuff lid removed showing screw lid
Burner resting on lower stand
Burner in the lit position in lower stand
Upper wind screen attached to lower stand
Kettle in wind screen and pot holder
Pot in wind screen and pot holder
Fry pan in cooking position
Simmer/Snuff lid in simmer position
Winter pre-heat attachment
Packed burner with winter attachment
Winter attachment in position to pre-heat
Burner w/winter attachment ready to light
Winter accessories

Wednesday, November 12, 2014

Silver Lake

Silver Lake (Late June 2014)
I was able to make to Silver Lake twice this year.

The first time was at the end of June 2014.  At that time the lake was all but froze over.  The trailhead parking lot was complete full, but I did not pass anybody on the trail (nor did anyone pass me ;) ). At the lake there were several groups camping, so I spent very little time at the lake. The one creek crossing on the trail was flowing high and was a little tricky to cross.

The second time was on 1 Sep 2014.  The trailhead parking area was once again full. The trail was very busy with people and the lake was over-run.  I did not go on to Silver Glance that day. My hiking companion experienced some trouble with blisters, so we spent a little time at the lake dealing with the blisters before descending the trail.  The creek crossing was uneventful but still flowing well.


Silver Glance (Late June 2014)
On that nice day in June 2014 I also took the one mile off-trail trip to Silver Glance.  Silver Glance was completely iced over.  I was walking on several feet of snow for about half the distance to the lake.  As you can see in the picture, not much detail as to the beauty of the area, but the location is absolutely beautiful.


Sunday, October 5, 2014

Solo Hike from Moon Lake to Hayden Pass Trailhead (Day #3)

Considering the altitude, last night was warm.  The temperature barely dropped to 57°.  I was wide awake at 06:00 so I decided to start the day.  The forecast was for rain today, and the morning sky was indeed red.  My third day planned camp was to be in the vicinity of Anderson lake.  According to the GPS I was only about 2.5 miles from Anderson lake. The trail (Ledge Trail) was relatively flat and looked to be lightly used.  There were no foot prints on the trail, and the trail would disappear at times.  Every meadow I would loose the trail, and need to find it once the meadow was crossed. Several times in the trees the trail would disappear.  One time a downed tree, across what I believed to be the trail, hid the actual trail the turned 90° left.  The tree had actually fallen at the turn in the trail, and lay along the trail.  When I went around the root ball, the trail was not on the other side.
he length (height) of the tree left me 'lost' for a bit until I realized the trail actually turned.

Near Anderson and trail came in from Rock Creek and there were horse tracks, and at one point I heard a horse whinny, but I never saw them.  After a few pictures, and it still being early morning, about 09:00 I continued down the trail towards my planned day 4 camp site near Lightening and Helen lakes.

Leaving the Ledge Trail I joined the Highline (#25) for a short distance until I came to my last fork before committing to the trail to Helen and Lightening lakes.  Several hundred yards down the trail to Helen I couldn't shake the feeling that I need to return to the last fork and go to Jack and Jill lakes. Since my original goal really was to get to Helen lake I tried to ignore the feeling, but the feeling would not go away.  I finally reversed course and head towards Jack and Jill lakes.  About a my down the trail I encountered a scout group that stopped me to ask some trail directions and distances.  The scout group was actually headed for Moon Lake, (my point of origin), and were also on their third day.  They had entered at Mirror Lake, my destination, and when I encountered them, they were about 14 miles in from their trailhead, while I was nearly 30 from my entry point.  I decided to take lunch while I chatted with them, and when they found I was carrying a Satellite asked if they could make a call.  Seems they had had some sick scouts that had returned to the trailhead and wanted to make sure someone was aware.

After the Scout encounter, the first humans I had seen on the trip since early the first day, I continued towards Jack and Jill expecting to make and early camp.  When I arrived at Jack and Jill the place was over-run with cattle and I decided I wouldn't be doing that again!  So I got out the GPS and noticed that I was about about 13 miles from my take out point.  Deciding to push on, with plans to camp and Carolyn lake for the night.

Dead Horse Pass from East side base
The climb up out of Jack and Jill over Dead Horse pass is something, and as I sat at the top of Dead Horse Pass to take some pictures, the sky split open with a thunder and light show.  Here I was above the tree line and lightening was striking all around.  As I hurried off the pass, the rain came, then snow and hail, then more rain.  In fact, it rained for the next 4 hours.  The trail ran with water, and by the time I descend the pass, and got to Carolyn I was muddy to my knees, dry feet, pack and body, but I was muddy from the knees down.  Checking the GPS I decided to pass Carolyn and strike for the trailhead.  I called my wife to come meet me at 22:00, leaving what I thought would be a small cushion to allow me to arrive first.  Turns out, the downhill helped and I arrived at the trailhead about 21:00 after a 25 mile day.